ion-skeleton-text
Skeleton Text is a component for rendering placeholder content. The element will render a gray block at the specified width.
Skeleton screens… You might think they sound a little scary and or that they’re hard to implement, but what if I told you that they are actually quite simple to make. Once added to your app, skeleton screens become an awesome feature to make your app feel incredibly fast. When building an app, you’re always making sure that you are doing everything correctly from a technical perspective to ensure great performance. But another, often ignored part of performance is called perceived performance. Perceived performance is how fast an action appears to happen to the user. Skeleton screens are a great way to improve the perceived performance of your app, when combined with traditional optimizations (lazy loading, code splitting, etc).
Let’s dive a little deeper into what skeleton screens are, why they are better than traditional loading spinners, and how Ionic makes it easy to use them!
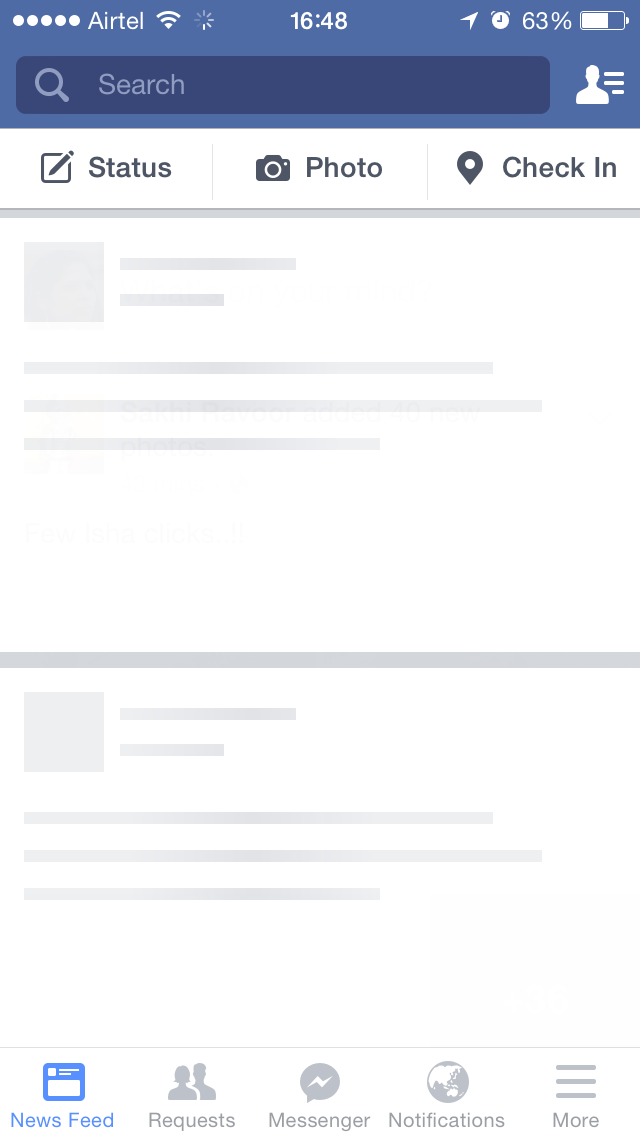
Facebook is on of the Skeleton example. They make heavy use of skeleton screens in their native app and web app. They use a similar implementation to Medium, rendering a Skeleton Screen where content will eventually be:
One problem with that is the more people you compel to give you their time, the harder it becomes for your system to handle all that traffic.
But there is always something extra you can do to shorten the time from app start to app use for your user even if it’s just perceived as being shorter.
Let’s see the all skeleton we use :
LET THERE BE CODE
Let’s create a blank Ionic project and check a cool new feature in Ionic 4 – ion-skeleton-text.
> ionic start ion-skeleton-text blankLet’s now go into the home.page.html file and add the content
<!-- home.page.html -->
<ion-content>
  <ion-list>
    <ion-item *ngFor="let item of items">
      {{ item }}
    </ion-item>
  </ion-list>
</ion-content>
We also need some content which we will display with some delay
// home.page.ts
export class HomePage implements OnInit {
  items: Array<string>;
  constructor() {}

  ngOnInit(): void {
    setTimeout(() => {
      this.items = [
        'Berlin',
        'Buenos Aires',
        'Madrid',
        'New York',
        'Paris',
        'Sydney',
        'Tokyo'
      ];
    }, 2500);
  }
}
If you now execute
> ionic serveyou will see something like this
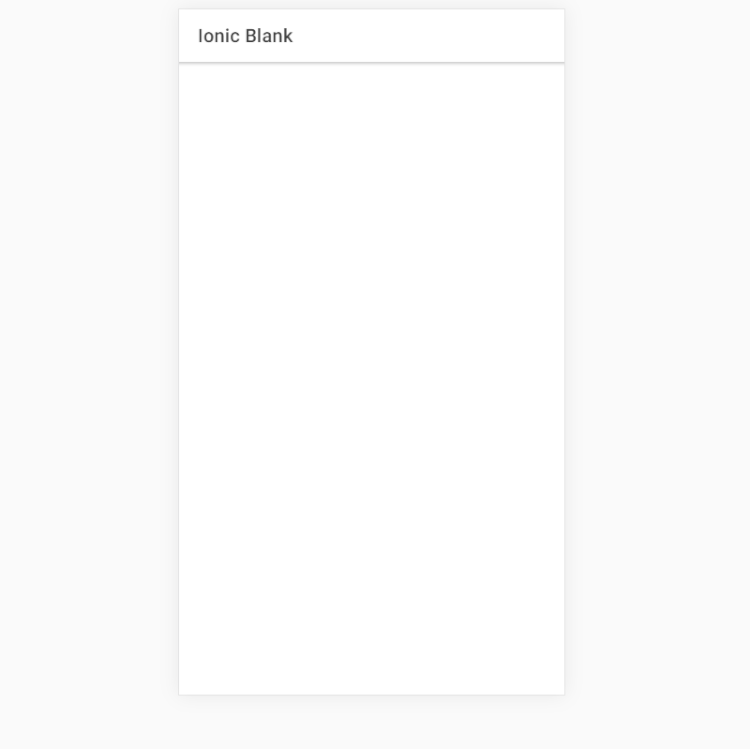 No loading indication
ADDING A LOADING SCREEN
In order to let the user know that something is going on in the background, we could add a loading indicator which we would remove once the data has been loaded.
// home.page.html
export class HomePage implements OnInit {
  items: Array<string>;
  constructor(private loadingController: LoadingController) {}

  ngOnInit(): void {
    this.loadData();
  }

  async loadData(): Promise<void> {
    const loading = await this.loadingController.create({
      message: 'Loading cities...'
    });

    await loading.present();

    setTimeout(() => {
      this.items = [
        'Berlin',
        'Buenos Aires',
        'Madrid',
        'New York',
        'Paris',
        'Sydney',
        'Tokyo'
      ];

      loading.dismiss();
    }, 2500);
  }
}
I won’t go into the fact that displaying a loading screen should be handled separately because that’s not the point of this post but I know you would never push code like this 😉
Now if we save and check out our browser again we will see a nice loading screen.
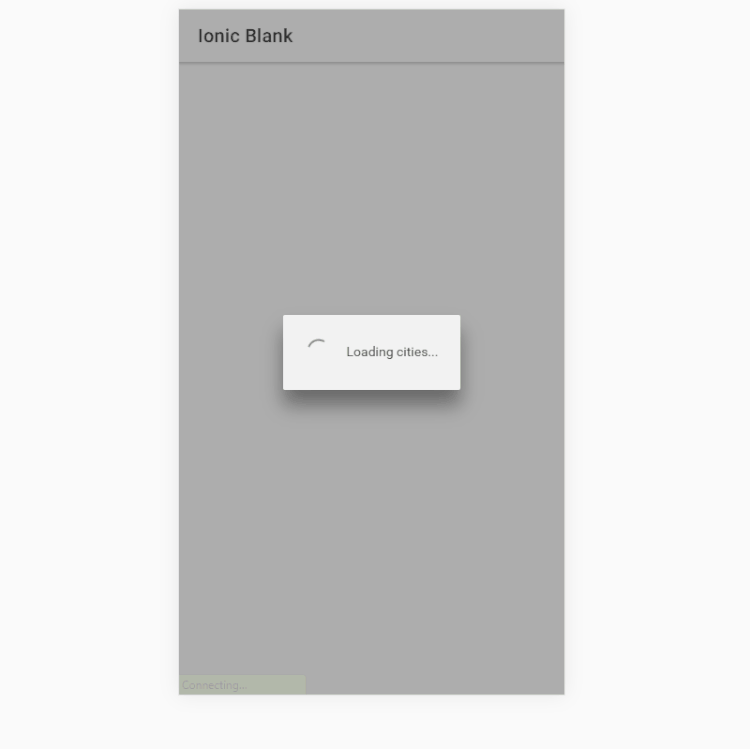 Loading screen
LET’S MAKE IT A LITTLE BETTER
One thing that we know about loading screens is that we don’t really like them. Loading screens on games, apps or anywhere else is something that starts to annoy us quite quickly so we have to keep them as short as possible or remove them completely.
We can try to trick people into believing that the app is already in the process of displaying some content when in fact it’s still waiting for the server to respond. In some cases, it’s just enough to let your users feel like the app is working to make them happy.
ION-SKELETON-TEXT IS THE ANSWER
ion-skeleton-text is a new UI component which displays a placeholder content instead of the true one.
Implementing it is very straight-forward as you will see soon. Let’s dive right into it.
<!-- home.page.html -->
<ion-content>
  <ion-list *ngIf="items; else skeleton">
    <ion-item *ngFor="let item of items">
      {{ item }}
    </ion-item>
  </ion-list>
</ion-content>

<ng-template #skeleton>
  <ion-list>
    <ion-item *ngFor="let item of [50, 20, 70, 80, 50]">
      <p [ngStyle]="{ width: item + '%' }">
        <ion-skeleton-text animated></ion-skeleton-text>
      </p>
    </ion-item>
  </ion-list>
</ng-template>
What we do here is to simply show the items once they are set (after the 2500 ms) while displaying a few placeholder items in the mean-time.
We also got rid of the loading screen code again in the home.page.ts file to make it look like it was before.
// home.page.ts
export class HomePage implements OnInit {
  items: Array<string>;
  constructor() {}

  ngOnInit(): void {
    this.loadData();
  }

  async loadData(): Promise<void> {
    setTimeout(() => {
      this.items = [
        'Berlin',
        'Buenos Aires',
        'Madrid',
        'New York',
        'Paris',
        'Sydney',
        'Tokyo'
      ];
    }, 2500);
  }
}
Now if you save all you will see something like this:
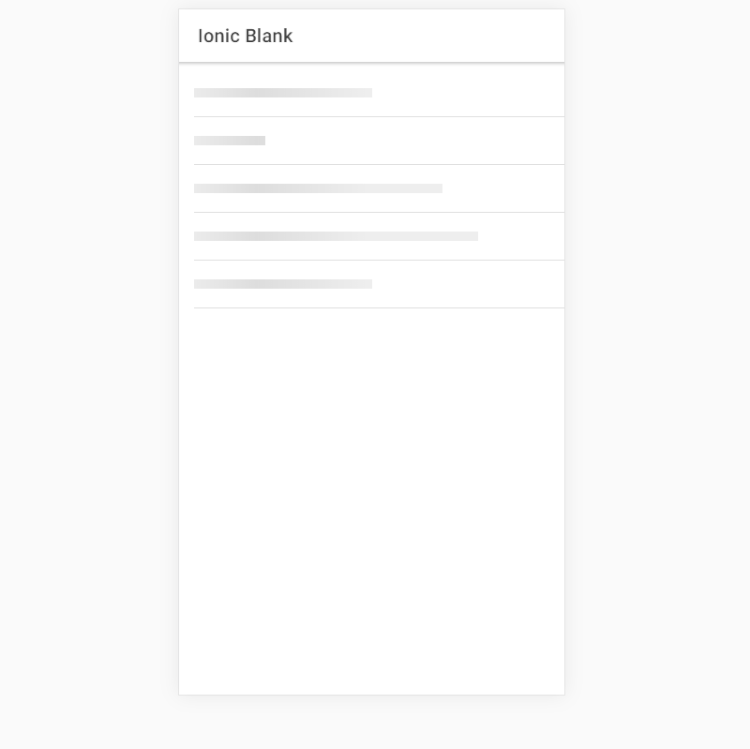 Skeleton Skeleton text
This looks a lot more dynamic than having just a simple spinner and loading message. If you are displaying complex data you can even take advantage of two other cool Ionic component – ion-avatar and ion-thumbnail.
Let’s create one final skeleton-text item which will represent some more complex data.
<!-- home.page.html -->
<ion-content>
  <ion-list *ngIf="items; else skeleton">
    <ion-item *ngFor="let item of items">
      <ion-thumbnail slot="start">
        <img [src]="item.image" />
      </ion-thumbnail>
      <ion-label>
        <h3>City: {{ item.city }}</h3>
        <p>Country: {{ item.country }}</p>
        <p>Population: {{ item.population }}</p>
      </ion-label>
    </ion-item>
  </ion-list>
</ion-content>

<ng-template #skeleton>
  <ion-list>
    <ion-item *ngFor="let item of [1, 2, 3, 4, 5]">
      <ion-thumbnail slot="start">
        <ion-skeleton-text animated></ion-skeleton-text>
      </ion-thumbnail>
      <ion-label>
        <h3>
          <ion-skeleton-text animated style="width: 50%"></ion-skeleton-text>
        </h3>
        <p>
          <ion-skeleton-text animated style="width: 80%"></ion-skeleton-text>
        </p>
        <p>
          <ion-skeleton-text animated style="width: 60%"></ion-skeleton-text>
        </p>
      </ion-label>
    </ion-item>
  </ion-list>
</ng-template>
The typescript code has change also a little:
export class HomePage implements OnInit {
  items: Array<any>;
  constructor() {}

  ngOnInit(): void {
    this.loadData();
  }

  async loadData(): Promise<void> {
    setTimeout(() => {
      this.items = [
        { city: 'Berlin', country: 'Germany', population: '3.5 million', image: '...' },
        { city: 'Buenos Aires', country: 'Argentina', population: '15 million', image: '...' },
        { city: 'Madrid', country: 'Spain', population: '3.3 million', image: '...' },
        { city: 'New York', country: 'USA', population: '19.5 million', image: '...' },
        { city: 'Paris', country: 'France', population: '2.2 million', image: '...' },
        { city: 'Sydney', country: 'Australia', population: '5.4 million', image: '...' },
        { city: 'Tokyo', country: 'Japan', population: '9.2 million', image: '...' }
      ];
    }, 2500);
  }
}
The final result looks now like this:
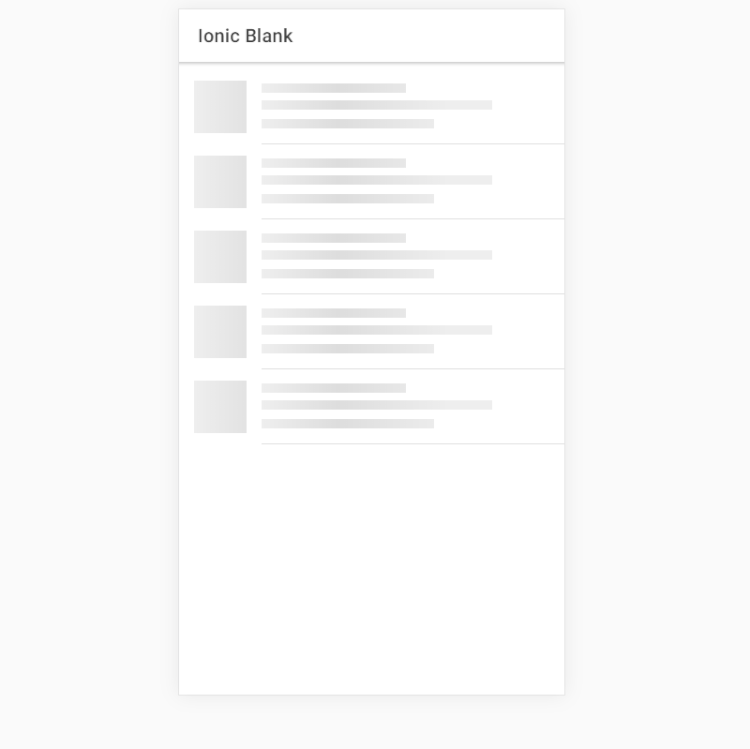
A more complex example
Now that’s pretty, isn’t it?
The ion-skeleton-text UI component can add a little twist to your app and give the user something shiny to look at while your app does all the heavy lifting. It will keep them focused on something until the final content loads fully and you are able to display it. Giving the user the feeling that the app is running instead of waiting will make them come back and will give you more users to serve.